Pages

Sunday, March 31, 2013

Easter Nails Tutorial

I was hoping to have a St. Patrick's Day mani for you, but I got a little lazy. All I did was a mint green nail with a silver and green glitter top coat. While it was cute, I didn't think it was exciting enough to write about. My Easter nails, however, are! Let me go ahead and show off one of my hands.


Isn't the little chick just adorable? I get asked by readers and followers all the time how I get the detail. I've gone over the steps in previous posts, but not in a formal manner. It's super simple to do, and the best part is that it's the same process for both hands! All the worries of off-hand detail are taken away! How great is that?

Here are the steps:

1 - Paint a coat of clear onto a sheet of sticker paper in a few nail-sized patches. I use the "Hello my name is" stickers since it gives a big, flat area to work with. DO NOT use a quick dry. Try a bit to see why. :)

2 - Once dry, about 10-30 minutes depending on brand, it's time to get creative. Here's the big secret on how to get the detail. Use a fine tipped Sharpie pen or marker to draw whatever you like or whatever you can. I would have liked to draw an Easter Bunny, but I cannot. So I drew a hatching chick and an Easter basket. If you do any text, it needs to be done backwards. Practice first if you aren't familiar with this.

3 - Give the ink a few minutes to dry. I also patted the drawings with a tissue. Then paint a second coat of clear. This does two things. It protects the ink from mixing with the colors and thickens the patch to make it easy to remove without tearing. If you use the pen instead of the marker, this coat will have a lightening effect on the ink.

4 - This part takes a little longer to dry, but not by much. Now, it's coloring time! You only need a tiny bit of color to fill in the lines you drew. Use what you have: a toothpick, tiny paint brush, dotting tool, or whatever else. Don't make it thick or else it will take forever to dry. Opacity is not an issue. If you're worried about the colors mixing, give it a minute between colors.

5 - Let the colors be for about 5 minutes. They do not have to be completely dry, but they do have to be set. If the designs are going onto a white background, you can skip this next part. Paint the back of your drawing white and leave the outside of it clear. White is usually a very thick color, so take care to be as thin as possible with it.

6 - Snack time! Get away from the work for about half an hour. Play a game. Watch a rerun. Resist all urges to mess with the design. If you pull it off too early, it will stretch or break because it's still wet underneath. The time it takes in this step depends on how well set the previous layers are and how thick the white is. When it's done, you should be able to leave a fingerprint on the white with a little pressure. If it takes no effort, wait a little longer.

7 - Smooth out the fingerprint and carefully remove the design from the sticker paper. Here's a step I completely forgot for this mani. Cut the design down to size. Try to leave a millimeter margin so it doesn't wrinkle much along the curve of your nail or ruin the design when it's top coat time. If you forget this step, the edges will not be as smooth as they can be. I filed the edge off and dissolved the sides trying to remember how I got them so nice before. (I happened to be sick today, so my head wasn't screwed on right.)

8 - Place the design on your completely finished nail. You should already have your base, color, and top coats done and dry. If you haven't done this yet, lay the designs on the sticker paper and do it now. The design should be pliable for at least another hour or two, so you have time. Once placed, make sure the edges are as flat as possible. Just pushing them down softly should do it.

9 - Clear coat the whole nail, and you're done!


It does take time, but the steps are super simple. Clear, Draw, Clear, Color, White, Dry, Cut, Place, Clear. This is how I did my Fox In Socks Nails as well as a few other manis. I had to do backwards lettering for that one. People have asked me to make sets for them. While I'd love to do so, the designs get very brittle after about a day, so shipping them doesn't work very well.

Well there it is, from start to finish. I really hope you enjoyed my tutorial! Feel free to post any questions you have or the results of your first attempt in the comments below. I'd really like to see some of your work!

Tuesday, March 12, 2013

Riveting Stripes

I wore my Sugar Rush manicure for a week and nothing happened. No chipping, no tip wear, nothing! (I used Sinful Colors Clear and their Quick Dry oil as my top coat.) So of course I was getting impatient. Last night, I couldn't take it anymore and removed it. But what to replace it with?

I have 3 orange-based colors I've acquired recently. They are Sinful Colors Orange Cream (from the Sugar Rush collection), NYC Times Square Tangerine Creme, and Zoya Arizona. I thought they could make an interesting combination, so I prepped my sticker paper with stripes and dots of each color.


To start, I decided to use the Orange Cream as my base color because the other two were more vibrant. I thought they would do better as accents. It took 3 coats for opacity and it applied really well.

After some testing, I saw that Arizona looked better over the NYC instead of vice versa. I cut the NYC into stripes and applied them at angles on all but my ring finger. I applied small dots of Arizona like rivets over the stripes.

I didn't know what to do with my ring finger, but I did know that I wanted to break up the monotony a little. My husband suggested I "do a little shape, like a heart or something". Well, I don't have any of those cute little punch-outs, so I opted for cutting out a diamond shape. I "secured" the corners with rivets, and voila!

It's getting close to St. Patrick's Day, so I expect my next entry to be themed and very, very green!

Tuesday, March 5, 2013

Sinful Colors Sugar Rush Inspired Polka Dot Mani

It has been about 5 months since my last entry. I think the 30 day challenge wore me out. I haven't done very many creative designs with my nails since then. I've even gone so far as to let some of my manicures chip pretty badly!

The good news is that the new spring pastels have inspired a little bit of creativity in me! I have been seeing the Sugar Rush collection all over Facebook, so I went to Walgreen's to pick some up. They were having a 4 for $5 sale I didn't know about, so that would be all of them for $10! They were missing the orange one, which made me sad. I picked up the light pink Cotton Candy, light blue Sugar Rush, light purple Candy Coated, and the yellow Unicorn. I thought my new bunch needed a green pal, so I also picked up a light green from Maybelline Color Show called Green With Envy. I'll talk about that guy later.  Let's go right into my manicure!


I started out with just a regular skittles manicure because I wanted to see how all of my new colors looked. Each color took 3 coats for full opacity because the formula is pretty thin. That helps with drying to me, so I'm not bothered by it. All of the Sinful Colors polishes applied well with no trouble. The green, which was Maybelline, has got to be the worst formula I've encountered to date. It kept pulling itself off of my nails and took multiple tries to finally get even coverage. It's unfortunate since it's the perfect green to match the rest.

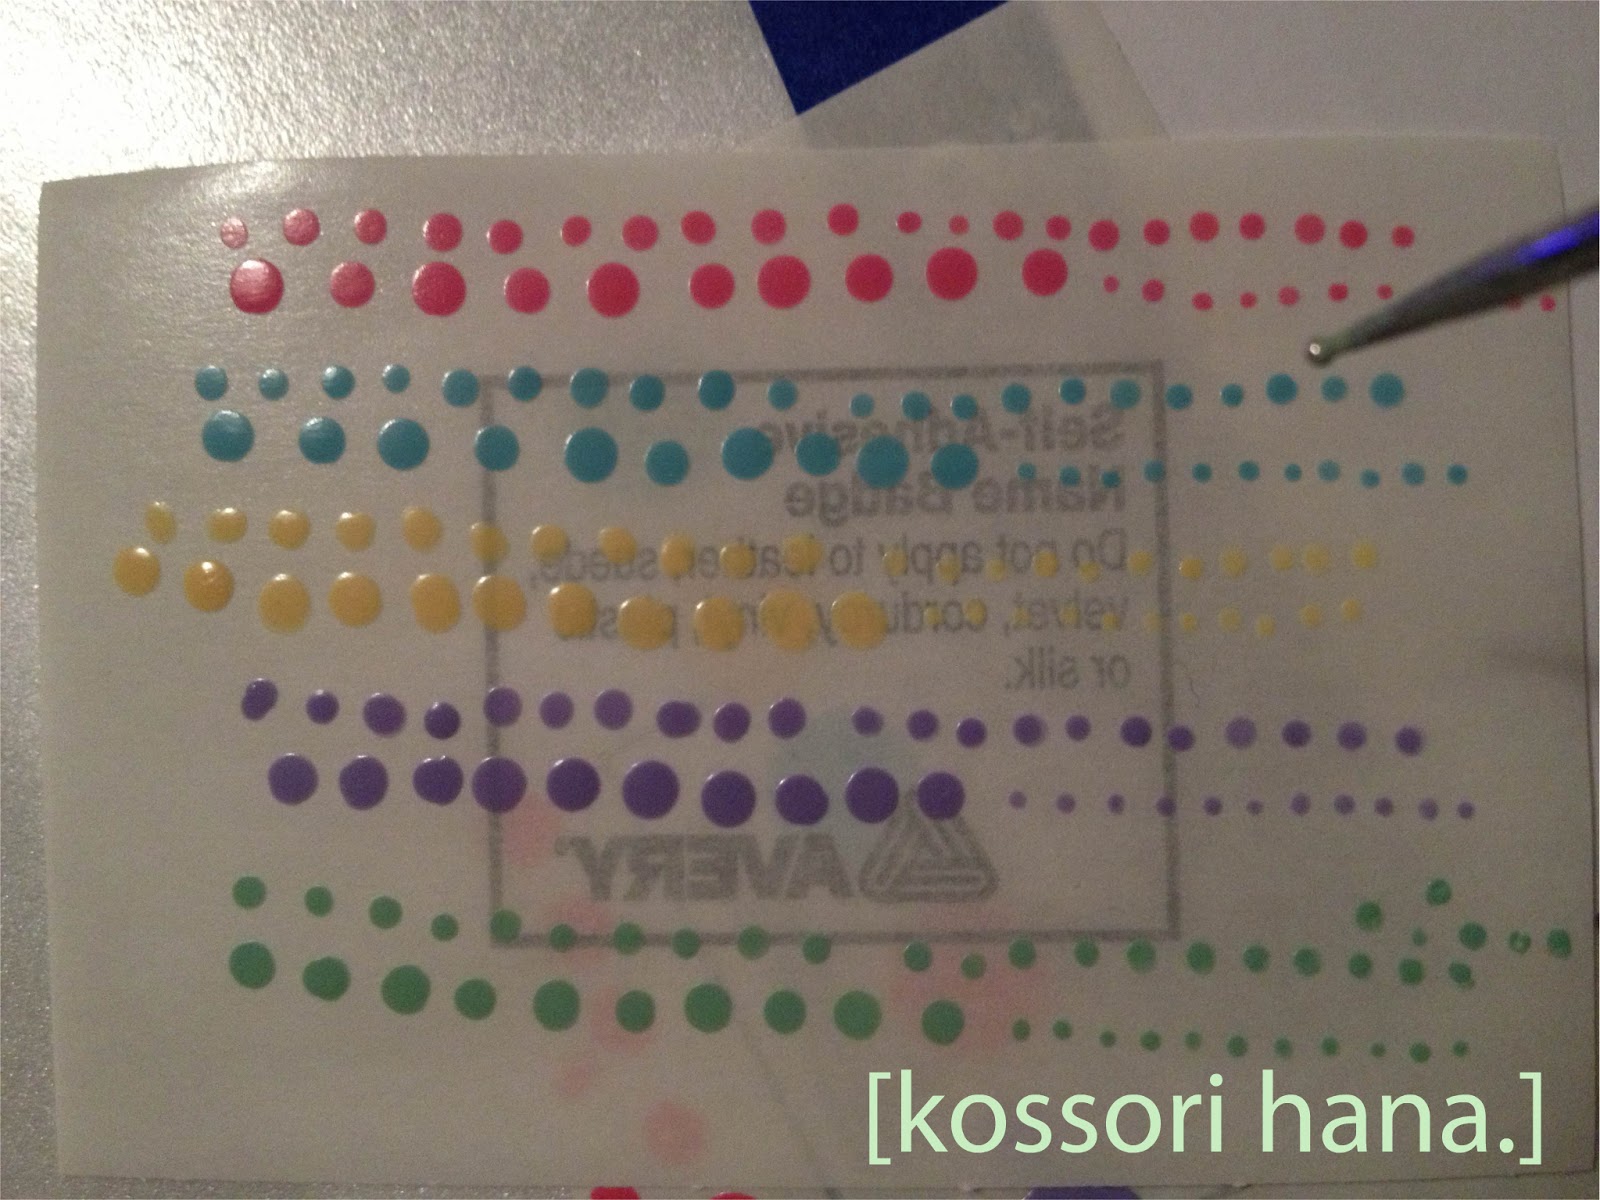
Once I got nice coverage on all my nails, I felt they needed a bit more design. Luckily I prepared polka dots ahead of time, just in case! To do this, all I did was dot the polish in various sizes onto sticker paper before I started my manicure! I bought a pack of name tag label stickers for $1 just for this purpose. By the time you're done with your base coat and 3 color coats, they're usually dried. I use my small dotting tool to nudge a dot up and place it on my nail. I do it this way so I know the dots will be nicely shaped when I apply them. (I also paint stripes that I use for French tips on this paper!)


Since I had 4 sizes prepared of each color, I decided to kind of do a gradient style with bigger dots at the tip and tiny ones near the base. I used only one of each size of each of the non-base colors, which was plenty. That's a total of 16 dots per nail. I sealed them in with a top coat, and that's that! My mom says they look like the candy speckled eggs you get at Easter. Do you like them?

UPDATE: Sinful Colors Unicorn (the yellow from the Sugar Rush collection) left a slight yellow stain on my nails. I used Seche Clear base coat underneath.

Thursday, October 4, 2012

Breast Cancer Awareness Manicure

October is breast cancer awareness month. To show support and raise awareness, a lot of bloggers and polish enthusiasts are creating pink manis, mainly on Wednesdays. I did mine, but I haven't been able to post it until now. Here it is:


The base is Sinful Colors Super Nova, the boobies are a custom mix, and the nipples are Kleancolor Sheer Peach. I topped it with NYC Matte Me Crazy to diffuse the metallic reflection in the photo. I hope you like it!

Tuesday, October 2, 2012

Fine China Nails

While I had fun with the 31 Day Challenge, I'm glad to be done with it. I like admiring my manicures for more than one day. But the last day of the challenge turned into something special! It was to recreate someone's challenge entry you really liked, and there was one from the day before I absolutely loved. You can see it here. The colors and delicate lines reminded me of fine china, so I recreated it. It's on my last post here.

I was very happy with my manicure as it was, and then NAIL MAIL!!! I got the dotting tools I ordered and I didn't know what to do. I loved the colors and the look, but I wanted to use my new toys! I figured my ring finger has an accent, maybe I'll just dot my thumb as an accent too! So I did, and I loved it more!!! Of course, I had to do the rest:


I used Sinful Colors Snow Me White (I don't really like this white, but it's thin enough to marble) and Ruby Kisses Blue Pearl. They look even more like fine china, don't you think?

Monday, October 1, 2012

31 Day Challenge 2012 - Days 26 through 31

Day 26 - Inspired by a pattern


Day 27 - Inspired by artwork


Day 28 - Inspired by a flag


Day 29 - Inspired by the supernatural


Day 30 - Inspired by a tutorial


Day 31 - Recreate your favorite challenge


Tuesday, September 25, 2012

31 Day Challenge 2012 - Days 21 through 25

Day 21 - Inspired by a color


Day 22 - Inspired by a song


Day 23 - Inspired by a movie


Day 24 - Inspired by a book


Day 25 - Inspired by fashion


Thursday, September 20, 2012

31 Day Challenge 2012 - Days 16 through 20

Day 16 - Tribal Print


Day 17 - Glitter


Day 18 - Half Moons


Day 19 - Galaxies


Day 20 - Water Marble


Sunday, September 16, 2012

31 Day Challenge 2012 - Days 11 through 15

Day 11 - Polka Dots


Day 12 - Stripes


Day 13 - Animal Print


Day 14 - Flowers


Day 15 - Delicate Print


Tuesday, September 11, 2012

Tuesday, September 4, 2012

Tuesday, August 28, 2012

My Wedding Manicure

So you might have noticed I haven't posted anything in a while. I've been a bit busy. I got married yesterday. I thought I'd share my manicure with you!


I used Kleancolor Sheer Pastel White topped with Mr. Right from the Kleancolor "Oh yes, I do!" mini collection. I topped that with China Glaze Luxe and Lush. For the accent, I used China Glaze Hook and Line and a little more Mr. Right with a rhinestone set in the middle.

How do you like it?


Thursday, August 16, 2012

Saints Nails - WHO DAT!!!

My aunt has been bugging me to do a Saints themed manicure since I started this blog two months ago. Well, I finally did one last night! I love it so much, and it looks so fancy!!!


I love these so much, and I know a lot of sports fans in Louisiana do as well. Over the next couple of weeks, I will be planning out press-on sets for purchase available in Saints, Ragin' Cajuns, and Tigers colors. If you would be interested in any of these sets, please leave a comment below! (This is not an order, just a general survey.)

Don't forget to like me on Facebook here to get updates about this venture and photos of the manicures I don't get around to blogging about. Otherwise, If you like what I've been doing, please follow my blog through the "Join this site" button in the right column.

Saturday, August 11, 2012

Hero Up!

The other day, I saw that White Jasmine Nail Art had posted a picture of nails she painted with various comic book super hero logos (Facebook photo of the nails). Most of the heroes represented were DC, so I had to counter with Marvel. I used lots of layering and even created a new color (the Spider-Man red I'm calling Spidey Sense) in order to get the looks I wanted. I'm posting a few photos because the glare on the nails kept getting in the way.


Which one is your favorite? I think they're all MARVELous!

Thursday, August 9, 2012

My First (Semi) Successful Water Marble

I finally got a water marble to work! I had trouble because the polishes seemed to dry too quickly. I don't know if it's the altitude, but it might be. Recently, I got a good tip for stopping the quick drying - a few drops of polish remover in the water. It helped a lot!


I used China Glaze Foie Gras, Dress Me Up, and Hook and Line (also the base coat). There are a few bubbles and wrinkles, but I actually got it to marble! My thumb turned our the best.


One more point about Hook and Line. I know it's very streaky when you paint it on, but it's such a great silvery grey. So, I was very happy that there are no streaks in the water marble. I decided to put just Hook and Line into the water for my other hand. It was great to not have streaks! You can see how smooth it is on my other hand.


What do you think?

Saturday, August 4, 2012

Soft Pink Nails

First, I want to say that I have started a Facebook page to go with the blog. You can "like" my new page by following the link to the right and clicking "like"! Ok... on to the manicure.

After my Olympic Rings peeled off, I thought it was time for something simple. I decided to go with a soft pink. I used some minis from the Kleancolor French Bijou collection: Sheer Pastel Nude, Sheer Peach, and Sheer Red. I layered one coat of each. While it looked nice, I just couldn't help it. I had to do something special just for me.


Can you see it? I think you might catch a tiny glimpse on the first two nails. There's some shimmer! A while back, I had sprayed some shimmer fragrance mist and some got on my hand. It made my polish sticky and the shimmer wouldn't come off. This time I did it on purpose. I spritzed my fresh manicure with the shimmer fragrance mist and followed with a topcoat. There are only a few sparkles per nail and most people won't notice a bit, but I know it's there just for me.

Thursday, August 2, 2012

Olympic Rings

I can't not have an Olympic themed manicure when even the Olympians themselves are rocking polish! So here is mine. It's a simple design, but it's still bold.


It's all Kleancolor (number of coats): Metallic White (1), Vegas Night (2), Gold Caviar (3), Black Out (3), Leaves Jingle (2), and Metallic Red (1). I used a straw to get the circles and traced it with a striping brush. For the tips, I just painted sideways - if you're slow and careful, you don't need to clean up the edge. I avoided all medium and big glitters.

What do you think - do they get gold, silver, or bronze?

Sunday, July 29, 2012

Fox In Socks Nails


Be Someone Cute is having a Dr. Seuss themed nail art contest. I couldn't pass it up! Fox in Socks is my absolute favorite Dr. Seuss book, so that's what I used as my inspiration. The tweetle beetles are my favorite because Mr. Knox turns it around on Mr. Fox!


This took me about 5 hours with all the detail and drying time. While I had all the colors I needed, some are layered to get the perfect hue. The right hand took about 3 hours. It has less detail, but it was done with my off hand. I also made 3 custom colors to match the book cover: the creamy yellow, the greyish brown, and the subdued orange.


Fox in socks, our game is done, sir. Thank you for a lot of fun, sir.